Daily Blogs

Don’t miss out sneak peek

How To Install The LCD Video Wall?

How To Install The LCD Video Wall?

Installation of a video wall can come at a high cost. That is why you need to plan how you want to install your video wall. 
So many errors may happen during the installation of a video wall which will raise the cost of installation. 
If you are not hiring a trained technician to install your video wall for you, then it is essential to look for an installation guide. 
In this article, we will guide you on how to install an LCD video wall. Let's dive right into it. 

Table of Contents

  • How To Install Your LCD Video Wall?
  • Unboxing Your Screens 
  • How Many LCDs Can You Put Together?
  • Things You Should Understand Before Buying An LCD Video Wall
  • What Makes LCDs Good For Making Video Walls

How To Install Your LCD Video Wall?

LCDs display images, texts, and even videos using liquid crystal technology. Since they can provide high-resolution images, they are mostly preferred for constructing video walls. 
However, installing an LCD video wall is often challenging, but we believe it will be a piece of cake if you follow this installation guide.
Image

Unboxing Your Screens

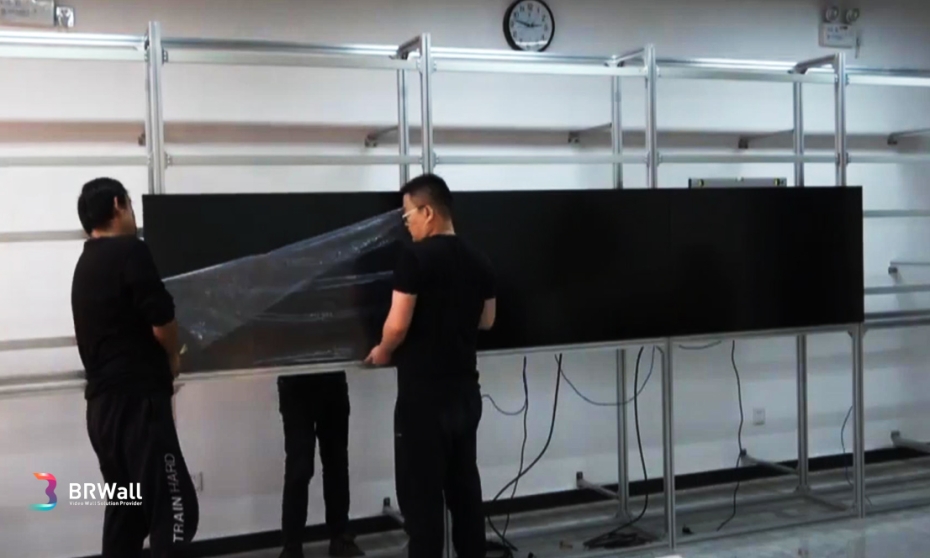
Once you have received your LCD screens, you must ensure that you unbox them properly. It is because manufacturers cannot take ownership of any damages that may occur after delivery is done.
When unboxing, it is essential to look for any flaws in the package. In case you notice that the package seal is cracked, it is crucial to notify your delivery company. 
Proper unboxing ensures that you do not damage your expensive LCDs, which might be very costly to repair.

Testing Your Screens

Once you have unboxed your LCDs, you must test your screens to ensure everything is working as expected.
Make sure you connect each screen to a stable power supply unit and turn it on. Your screen should work as expected. 
It would be best to test all the display features to know that every screen is suitable for use as a video wall.
If the screen is not working as expected, it may be essential to contact your manufacturer for inquiries.

Assembling Your Tools

For a successful installation, specific tools must be required to assist you. Some tools you require include a hammer, a screwdriver, a spirit level, and a measuring tape.

Installation of The Bracket

To start installing your LCD video wall, you need to install the bracket on the wall.
The bracket is meant to hold the screens in place. It lays the foundation of your video wall.
Therefore, it is vital to ensure that you attach it to the wall very carefully, for it will support all the weight of your screens.
To install the bracket, you have to ensure it is horizontal. You can use a spirit level to find the point at which the bracket is horizontally flat. If you do not find the horizontal point, the video wall might look very unprofessional, as the screens might not synchronize during installation.
Once you identify the point where it is stable and where you want it to be, you can now mark the wall. Marking the wall will allow you to know where to drill and insert screws.
Once you have marked the wall, you can drill your holes and install the screws to hold the bracket onto the wall firmly.
You can then locate the next bracket, keeping in mind the space that all the screens will occupy during the end of the installation process.
The number of brackets you will have to install will depend on the number of screens that will make up the video wall.
For example, a video wall of Four LCD screens will require four brackets.

Screen Installation

Once you have your brackets steadily attached to the wall, you can now fix your tv on the wall. 
To get started, securely fit the hooks at the back of the screen onto the bracket. 
You can use the screw to adjust the screen up and down until you reach a horizontal point. You can adjust a  different screw to move the screen forward and backward until you reach the desired position.
Once you attach all the LCD screens to the bracket, you can tighten the gaps between them. Make sure the screens are vertically and horizontally aligned to make a seamless display.
After the installation, you should use a piece of paper to verify the seam gaps.

That is how you can install your LCD video wall. If you still find the installation process very challenging, BRWall has a team of experts who can help you do it in minutes.
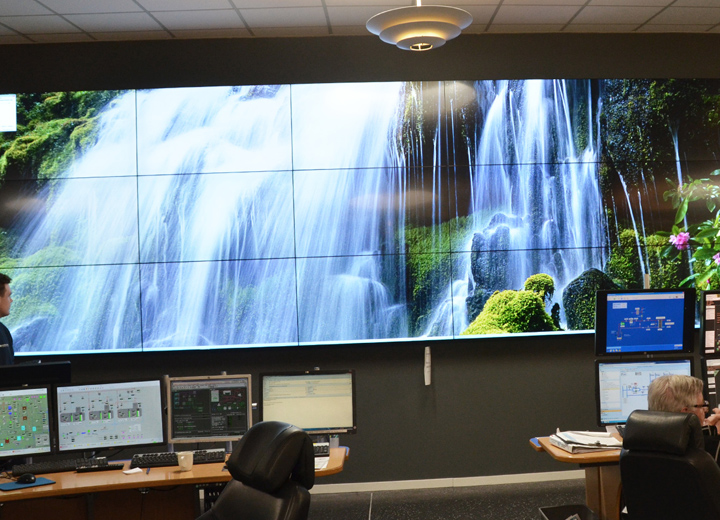
With a complete video wall, you can display any piece of content you wish. 

How Many LCDs Can You Put Together?

The number of LCD screens you can put together will largely depend on the requirements of your specific project.
LCD video walls can be constructed from as little as 2×2 or even 5×5. However, the maximum number of liquid crystal displays you can put together to form a video wall will largely depend on the type of video wall controller you use.
At BRWall, we have a series of video wall controllers and liquid crystal displays that are worth trying out. 
We also have customer-oriented service, including a live demo to help customers find what they want.
Video walls can significantly impact your brand; getting it right is very important.

Things You Should Understand Before Buying An LCD Video Wall

Before getting an LCD video wall, certain factors are important to understand that will help you get the best results.
If you do not take the time to assess this information, you will likely not get the desired outcome as quickly as possible.
Below are some of the things you should understand before getting an LCD video wall:

The goals of the business for using an LCD video wall

Before any visual implementation, the business coordinator must consider the business's goals that will be effective with this strategy.
It would be best if you knew how a video wall would promote your brand better than the current promotion methods.
A good example is that a video wall can do better in entertaining prospects with great visuals and even increasing their desire to check out your products. 
This might be more effective for your business than the promotion methods you have already employed.

The space to be occupied by the video wall

Before purchasing an LCD video wall, it is very crucial that you understand the space that it will be occupying. 
You might ask yourself some questions, Is the space enough to fit the LCD screens? Will People see the video wall easily? What is the power requirement of the video wall?
Answering such questions will be very helpful in creating the video wall setup. Having a video wall that will not impact your target audience would not be very reassuring.
The space you set aside for setting your video wall is one that many people with ease can see.

The technical capabilities of the content

To collect excellent results from your video wall, you should optimize your content according to the type of video wall you 
use.
Low-resolution text and images will make a video wall look unprofessional and will not bring out the desired results.
A piece of content might look good on a laptop but not translate correctly on a big screen. Also, if your content is too long, it might not convert as desired.
Displaying long content on your video wall is not the best solution. You want people to get the message you are passing across in the shortest time possible.
This will help even those who are passing by to know that a specific product is being sold here. 
Short content that runs for at least 10 seconds is ideal for your video wall. Also, if you are displaying text, ensure they are readable from a comfortable distance. 
You have to give the people what they want when using a video wall. No one wants to strain to get the information you are passing across to them. 
It is best to avoid unnecessary wording. If you have difficulties creating your content, BRWall has some professionals that can guide you through the same. 
Remember that content is the essential aspect of any video wall, and getting it right will hugely impact your brand.

Display Configuration

To have an impressive visual, you need to have a uniform configuration of your LCD screen. The black part that separates each screen looks uncomfortable and might interrupt your content's flow.
It is good to have flat panels with a seamless gap so they cannot interfere with your content. 
It would be best to understand that the more professional a video wall looks, the more it is likely to foster a good impact on a brand.

What Makes LCDs Good For Making Video Walls

LCDs portray certain factors that make them highly desirable for constructing video walls. 
Below are some of the factors that make LCDs suitable for constructing video walls:

Energy efficiency

Since most video walls operate round the clock, they have to be super-efficient in energy consumption.
Liquid crystal displays operate at an optimum level with less energy than other displays. Low power consumption will lower utility bills making LCDs a good investment. 
Since they consume low power, they rarely overheat. This makes them efficient for 24/7 usage with low maintenance. 
As LCDs consume little power, they are less likely to cause a short circuit. Therefore, they tend to have a longer life span than other displays.
LCDs are highly reliable, which is why they are desired for constructing video walls.

LED backlighting

Liquid crystal technology requires some form of the backlight to operate. The backlight is used to illuminate the pixels to produce colored images on the screen.  
Liquid crystal displays support LED backlighting that helps improve the display's image quality. 
Manufacturers prefer LED backlighting because it is both practical and energy efficient. The LED is placed at the back of the LCD pixels to provide light.

LCDs do not suffer from screen burn-in

Screen burn occurs on devices that use phosphor-based pixels to produce images. Traditional displays such as cathode ray tubes fall under this category.
You will never have to worry about screen burn-in with liquid crystal displays, as they do not use phosphor compounds on their display technology.
Pixels of Liquid crystal displays are made of organic material, which is why they produce high-quality images.

Magnetic Interference

Liquid crystal displays are not affected by a magnetic field. This increases the areas in which they can be applied for use.
Some displays, such as CRTs, are affected by magnets. When a magnet is passed near the screens, the images get distorted, which is very disappointing. 
This LCD feature allows them to be used in industries even where extensive electromagnets applications are used.

LCDs have a longer lifetime.

Liquid crystal displays have a longer lifetime, so they are preferred for making video walls.
LCDs are worth the investment as they can serve a brand for a more extended period. A company will be able to enjoy the benefits of a video wall for a long time before they actually come to renew their display screens.
However good liquid crystal displays are, they have one downside. They have a limited viewing angle. 
Even though scientists have found a way to correct this problem, other LCDs in the market still have this problem.
Therefore, checking your displays before purchasing them is vital to avoid this problem as it might make a bad impression.

Conclusion

Installation of an LCD might be challenging, but we believe it will be easy if you follow the guide we have shared with you.
If you still have trouble with the instructions, contacting a technician is always a good idea. At BRWall, we have a team of professionals who can help you with the same.
LCDs consume low power and are highly reliable. This feature makes them a good investment option as they can serve an organization longer. 

BRWall is a world-class manufacturer of professional video wall controllers. Their experts are always available to help you with any video wall solution needs. Book a demo here: brwall.com/live-demos  For support, visit brwall.com or contact us anytime at This email address is being protected from spambots. You need JavaScript enabled to view it..

Related Articles

Consult with a
BRWall rep.

Need help? Contact us.

We’re here to ensure you find the right solution for your project. Let’s make it happen.
Documentation and Training
Phone & Email Support
Image

Solutions

BR60 Series Professional
BR40 Series Standard
BR10 Series Commercial
 

Software

AV Over IP IP Based
AV Over IP KVM
AV Over IP Matrix
 

LED Display

Supports

Contact Us

+8610 82749250